Hello again! In my previous post [https://willisrose.com/animated-clock-v2-0/], I detailed how to create an animated analog clock component. This post will detail how to add properties to the component so makers can easily customize the clock.
I also created another video to accompany this post:
Offset (aka Time Zones)
One of the earliest Power Apps I ever built was to help users calculate time in different time zones. I did a video series about it:Time Zone Converter Demo
I want my users to be able to change the clock forwards or backwards in time.
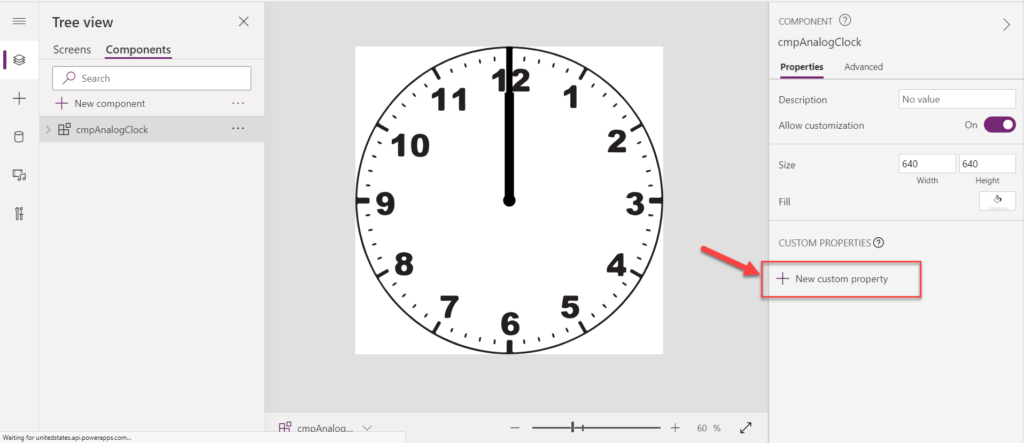
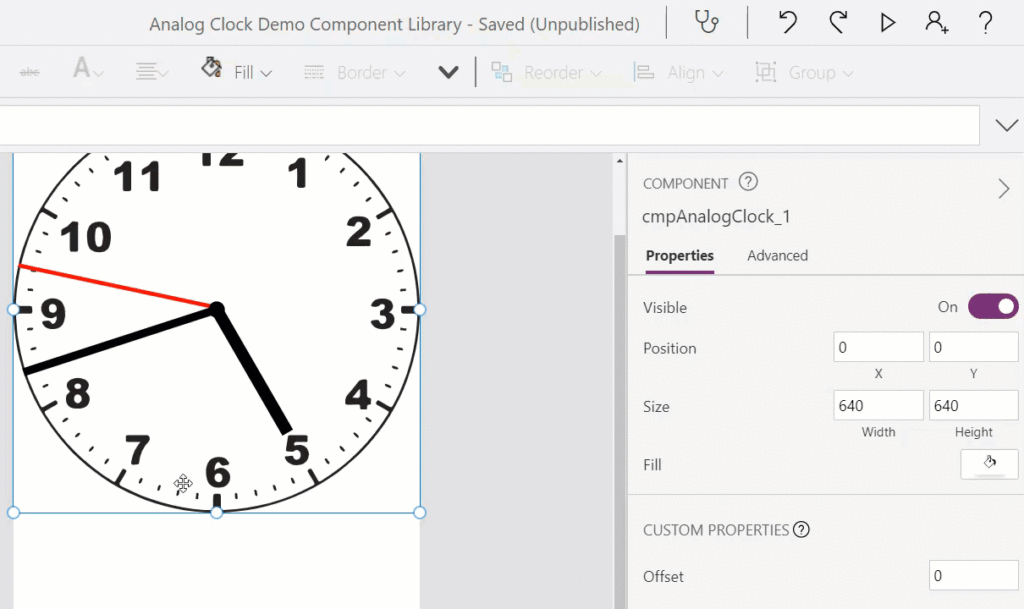
First thing I’ll need is to add a property to my clock component. Click New Custom property
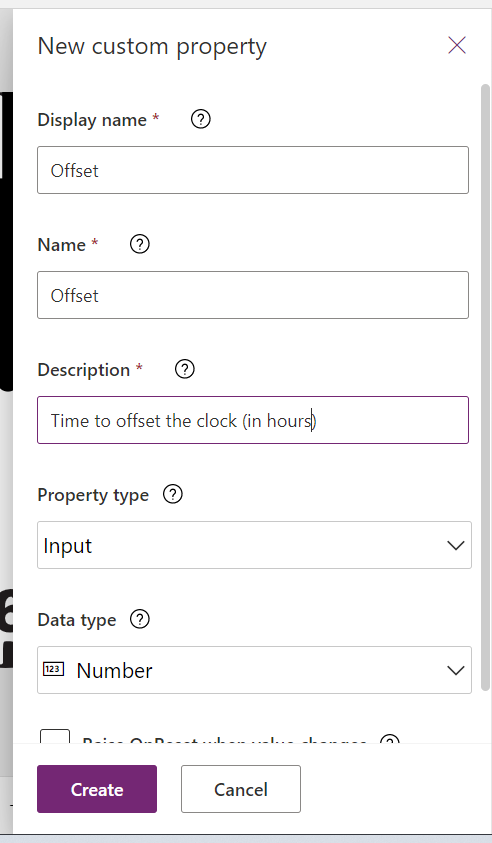
I called my property Offset and set the Data type to Number. I also recommend adding a Description
I called my property Offset and set the Data type to Number. I also recommend adding a Description
Then click Create
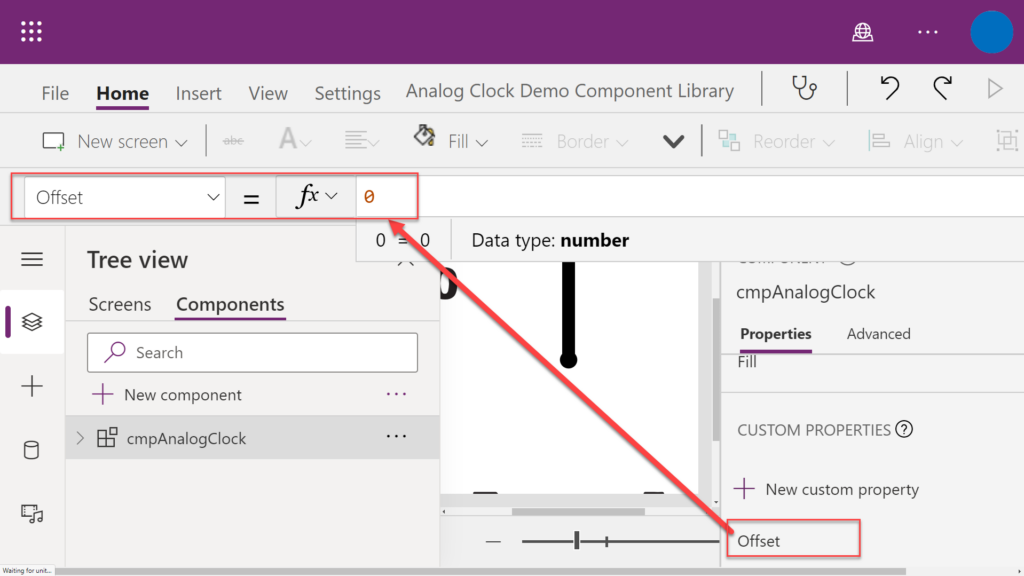
Before I forget, I need to set the default value to 0. Click the Offset property and update the value to 0
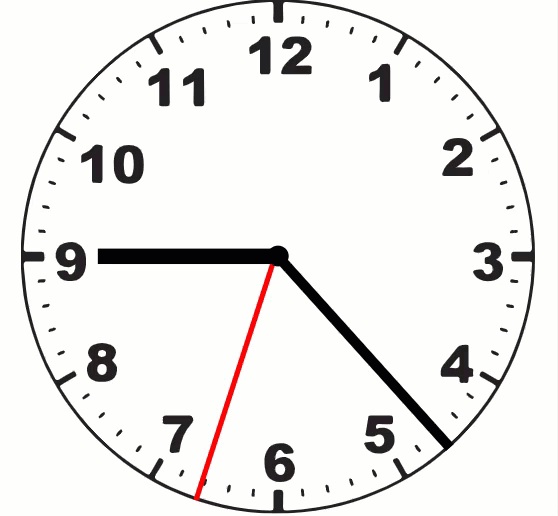
Now I need to update the timer control’s OnTimerStart property. I want the varNow variable to be offset by the number of minutes entered by the maker when they configure the instance of the component.
To do this, I used the DateAdd function: https://docs.microsoft.com/en-us/powerapps/maker/canvas-apps/functions/function-dateadd-datediff
Set(
    varNow,
    DateAdd(Now(),Parent.Offset,Minutes)
);
Tip
You can use Hours instead, but some time zones are offset by 1/2 hour.

To try it out, I switched over to the Screens tab and update the offset on the instance of the clock
Time Output
The next property I added was Time Output. This allows makers to access the individual time being outputted by the specific component instance. Just be sure to select Output for the Property type
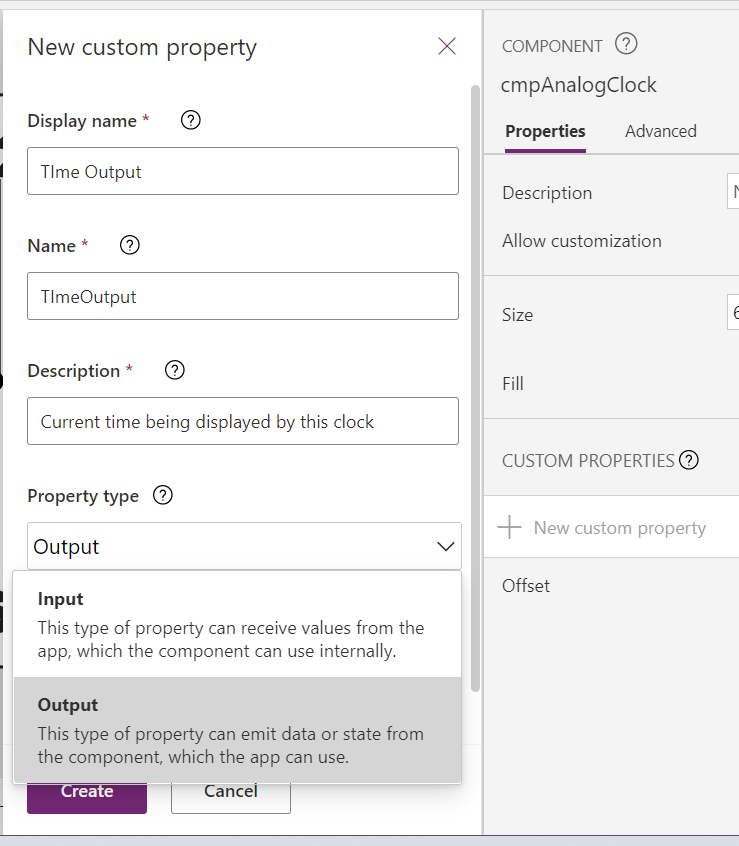
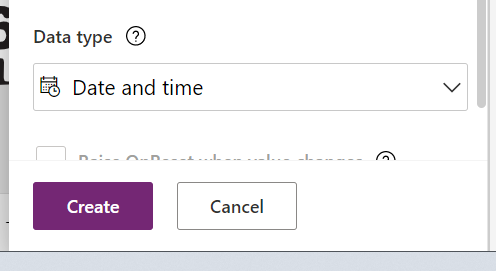
And the Data type to Date and time, then click Create
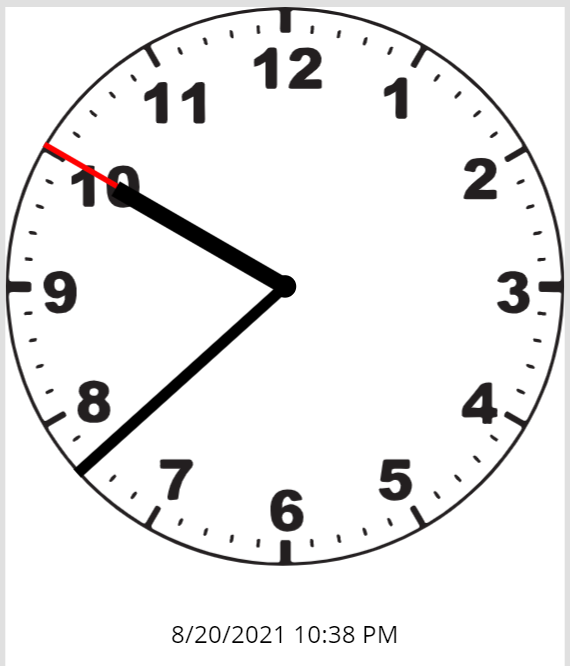
Then set the value of TimeOutput to varNow

Now you can use that time in the app, for example, to display a “digital” version of the time:

If I wanted to format the date & time, I could use the Text() function: https://docs.microsoft.com/en-us/powerapps/maker/canvas-apps/functions/function-text
Clock Colors
Finally, let’s talk about how I can customize my clock some more by changing the colors. For this example, I’m going to let all clock colors to all be the same. If you want to get fancier, you can repeat these steps for as many colors customizations you’d like your component to have.
First, I need to add an input property called ClockFill that is data type Color.
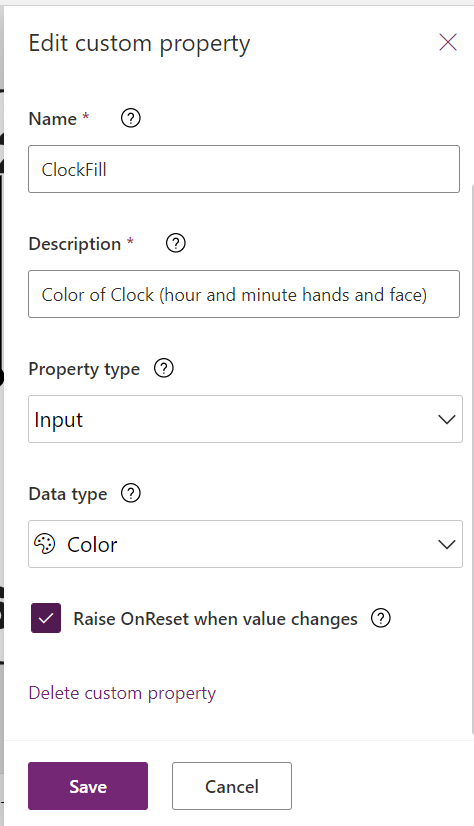
Also, I checked the Raise OnReset when value changes. This is because I need to convert the color from the color picker into a hexdecimal code used by SVGs.
Then in cmpAnalogClock.OnReset property, I need to declare a variable:
Set(varClockFillHex, Substitute( JSON( Self.ClockFill, JSONFormat.IgnoreUnsupportedTypes ), Char(34), "" ))
You can read my previous blog for more on this technique: https://willisrose.com/power-apps-tip-get-color-hex-code-from-a-color-value-in-canvas-app/
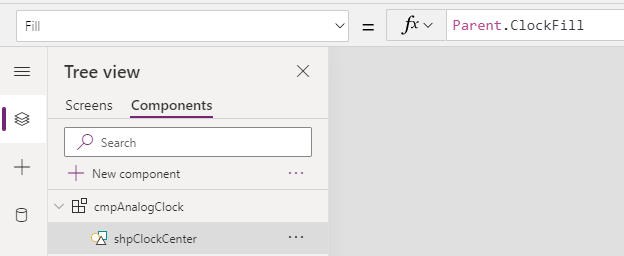
For the Clock Center, we just need to set the shapes’ fill to the custom property ClockFill
Next, I need to replace every instance of the hex color in the SVG code (i.e. minute hand, hour hand, and clock face)

Here’s an example of the SVG codes after I replaced everything:
"data:image/svg+xml;utf8, " & EncodeUrl("<svg width='200' height='200' xmlns='http://www.w3.org/2000/svg' xmlns:xlink='http://www.w3.org/1999/xlink' overflow='scroll'>

<rect x='97' y='30' width='6' height='70' fill='"& varClockFillHex &"' transform='rotate("& (varHour*360)/12 &",100,100)'/>

</svg>")
Tip
For really long SVG code (e.g. the clock face) , I recommend using a text editor (e.g. Notepad ++) to find & replace all hex codes with the variable
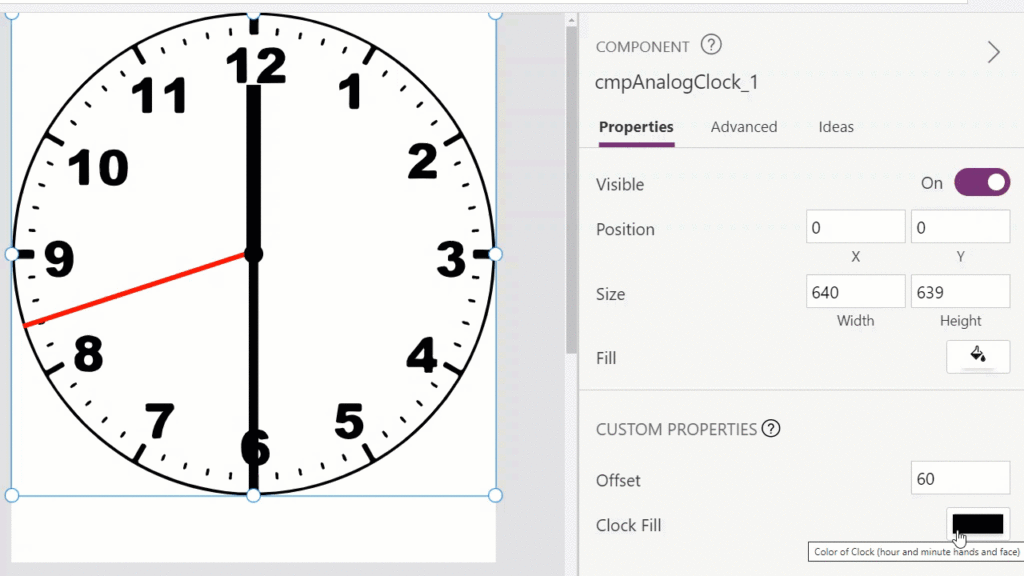
Now I can change your clock to any color I want.
Hope you found this blog helpful. Thanks!